How to build this web

Hello everybody! I think the best first post I can do is how to build this website, step by step. Probably this post will change in the future in order to reflect all changes in web. Hope you enjoy and learn!
Github Pages
First at all, we need to know something called GitHub Pages there is where magic occurs. Github pages host our pages and use CI/CD to mantain the page updated. We have one page per user and the free domain is like this web, chillaso.github.io. With Github Pages we have CD, so every time we push to master, a new release is created and deployed in production.
Let’s start creating a new repo named as: nameyouwant.github.io
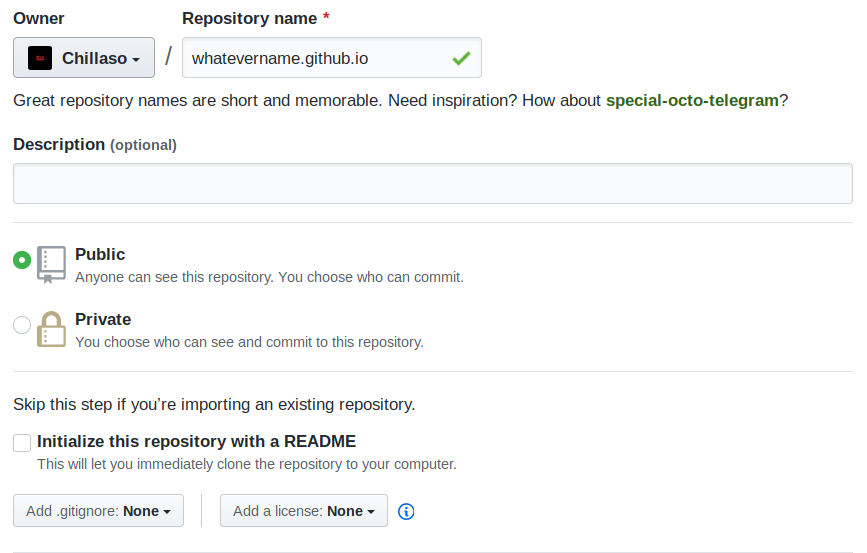
Actually the name could be chillaso.github.io, but I have one created before. Notice we are choosing a public repository, only if you have pro version of github you can choose it as private
Then we can check it out our repository settings, if we scroll down will see a section like this
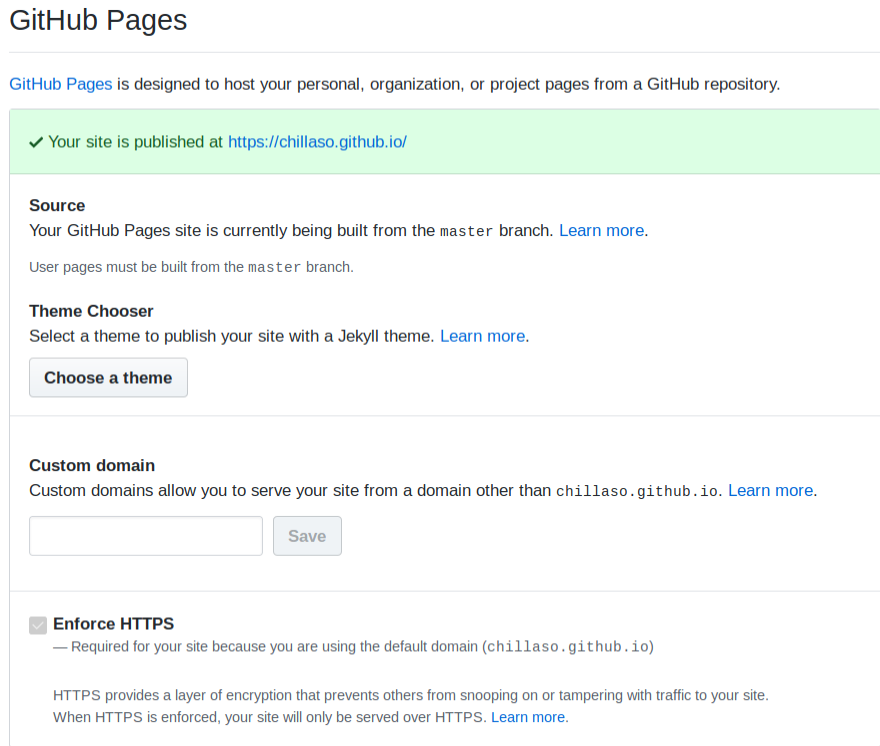
After this, we simply clone the repo, create an index.html and push it to master. After this we’ll be able to see our new incredible page! Let’s try it.
1
2
3
4
5
git clone https://github.com/Chillaso/chillaso.github.io.git
cd chillaso.github.io/
echo "Hello world" >> index.html
git commit -am "Hello world"
git push --set-upstream origin master
Simply like this! with this little configuration we have a static website deployed on Github. With this little approach you can do whatever you think, but edit a whole site from scratch is so tedious, so let’s roll in something better, Jekyll.
Jekyll Themes
Actually Github Pages uses under the hood Jekyll to render your website, and even you can choose some ugly predefined themes. But I recommend visit this website or this one and search some cool themes. These themes have predefined plugins like Disqus, sharing, Search Lunr… This has a lot of facilities, because we have an out-of-box website with cool CSS. This theme is Mediumish.
Note, take care deciding a theme becase must be github pages compatible in order to deploy in our repo.
But, how can I install a custom theme on my website? Well in my case is very simple, just clone the mediumish repo and copy paste all files and folders in your project folder. Now, you can commit and start editing and customizing. I’m not going to dive in customization options because every theme is different and I guess you know something about HTML and CSS.
Did you notice that you are deploying every time in master to see changes? So boring yah? Okey, let’s see how to deploy in your localhost.
Jekyll works in my machine
Well, this is so fucking simple, thanks to Docker, if you know nothing about Docker, check it as soon as possible because there are several companies and technologies which use Docker in the hood, the best example is Kubernetes, but this is other post for this blog. We are going to use Docker-compose, Jekyll has an image in Docker Hub, so is simple like this:
1
2
3
4
5
6
7
jekyll:
    image: jekyll/jekyll:3.8.5
    command: jekyll serve --force_polling
    ports:
        - 4000:4000
    volumes:
        - .:/srv/jekyll
If you know something about docker-compose, you know that we are defining a service wich image is from user jekyll and his image is jekyll in 3.8.5 version. We are initializing the container with jekyll serve --force_polling and binding 4000 localhost port to c 4000 container port. Then we are mounting a binding volume from ./ folder to /srv/jekyll. With this approach we reuse to install Ruby on Rails, its gems, jekyll… I usually run docker-compose up -d for start the server, docker-compose restart when several changes happens, and docker-compose logs -f when need to know what is happening.
Now we can visualize hot changes in localhost:4000 and start developing safety. You can create a new branch called develop and push your development code there, or you might want to use other workflow for git, like git-flow, take the best for you!
Jekyll structure
Jekyll is a static site generator, you can edit your content in your favourite markup language and thanks to some tech like Liquid you can render your page easily. After building this blog I notice that Jekyll is very useful for certain pages, but other complex pages maybe you want to choose a CMS or other tools, for example Netlify or Contentful. The main reason for choosing Jekyll is that is 100% compatible with Github Pages what means you have free hosting.
How Jekyll works? Well it use a specific directory structure you can see more details in their documentation, in my case I’ve the next structure:
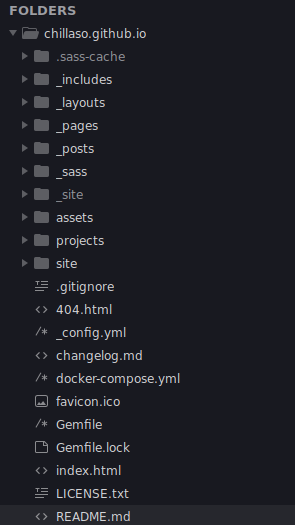
Big difference here is _pages and projects.
- _pages are used to hold static root pages which haven’t templates, or don’t need to be reused.
- projects this folder allow us to have a separete index.html. This index is neccesary if we want a root page like the main page. If we don’t have this files separated, we can have conflicts. Remember _pages are used to hold static content, and our projects page is going to be used as a template.
In the other hand, we have a special file named, _config.yml this is a very important file to Jekyll because is used to define main configuration of our site, and let us configure plugins and other stuffs. You can check my config file here and the official documentation about default config file here. I think is a waste of time explain whole available configurations, they are very intuitive so I prefer you check documentation, and if you need know something special just try to google it, there are a lot of info for Jekyll and Github Pages.
Edit content
Okey, now we have all concepts in our mind, now we need to come back to real world. How can I edit content and publish it? Well this is very easy, you only need to know a couple of things.
The first one is that Jekyll use a special nomenclature to determinate what is a post, you’re going to need to allocate content under _post folder and then create a file like this: YYYY-MM-DD-name-what-you-want.md. As you can deduce, year, month and day need to be informed, and then whatever name you want which would be used to create your URL. For this post we have something like this: 2019-06-12-how-to-build-this-web.md.
That’s all you need to know to editing content, that, and some of Markdown language (it’s pretty simplier). But there are some tricky stuffs that you would need to know about editing content and Jekyll concepts, headers
Headers
Headers let us tell Jekyll how it has to render the page and with what info. For this post I have something like this:
1
2
3
4
5
6
7
8
9
10
---
layout: post
title:  "How to build this web"
author: chillaso
categories: [ tutorial ]
tags: [jekyll, github pages, tutorial]
image: assets/images/how-to-build-this-web/bricks.jpeg
featured: true
hidden: false
---
Let’s see:
- layout: Layout is what page under
_layoutswe are going to use as template of this content. In my case, post.html is my template, you can check its code here. Jekyll let us to inherit layouts, that’s very useful, keep in mind when develop your site. - title: Very simple, which title we are going to display in the header of the page. This is used as title in our main page too.
- author: Author is a plugin I’ve installed, this indicates info about author that it’s defined in
_config.yml. - categories: Is an array that can have whatever strings you want, this is useful for makes categories in your site. We can render a page like this.
- tags: Like categories, but other semantic meaning.
- image: I guess it isn’t necessary to explain this.
- featured: This help us to difference content between featured and not featured. If we have a featured content we will display in some place but not in others and viceversa.
- hidden: The same that featured, usually you’re going to have featured true and hidden true, or featured false and hidden false, that’s the right meaning, but sometimes you would like to mark a content as featured but display in your non-featured box too.
As you can see, headers let us create extra information. Actually headers is a wrong name, Front Matter is the real name, and you can check Jekyll doc about this here.
Conclusions
I hope you’ve learned how to build this web and know how to build yours. Now we know that Github Pages exists, and we can create a free site hosted on our Github account, customize that with themes and create and manage content thanks to Jekyll.
Build this web was eight hours of work more or less. Reading post like this was probably 80% of my invested time, 20% resting was just coding and understanding how Jekylls works. Static web pages are so simple and I encourage everybody to build their own projects like this, you can learn a lot of new stuffs, enough to be manteinable and not so complex like a CMS, small projects, personal pages, simply blogs…
Just code guys!
Regards!